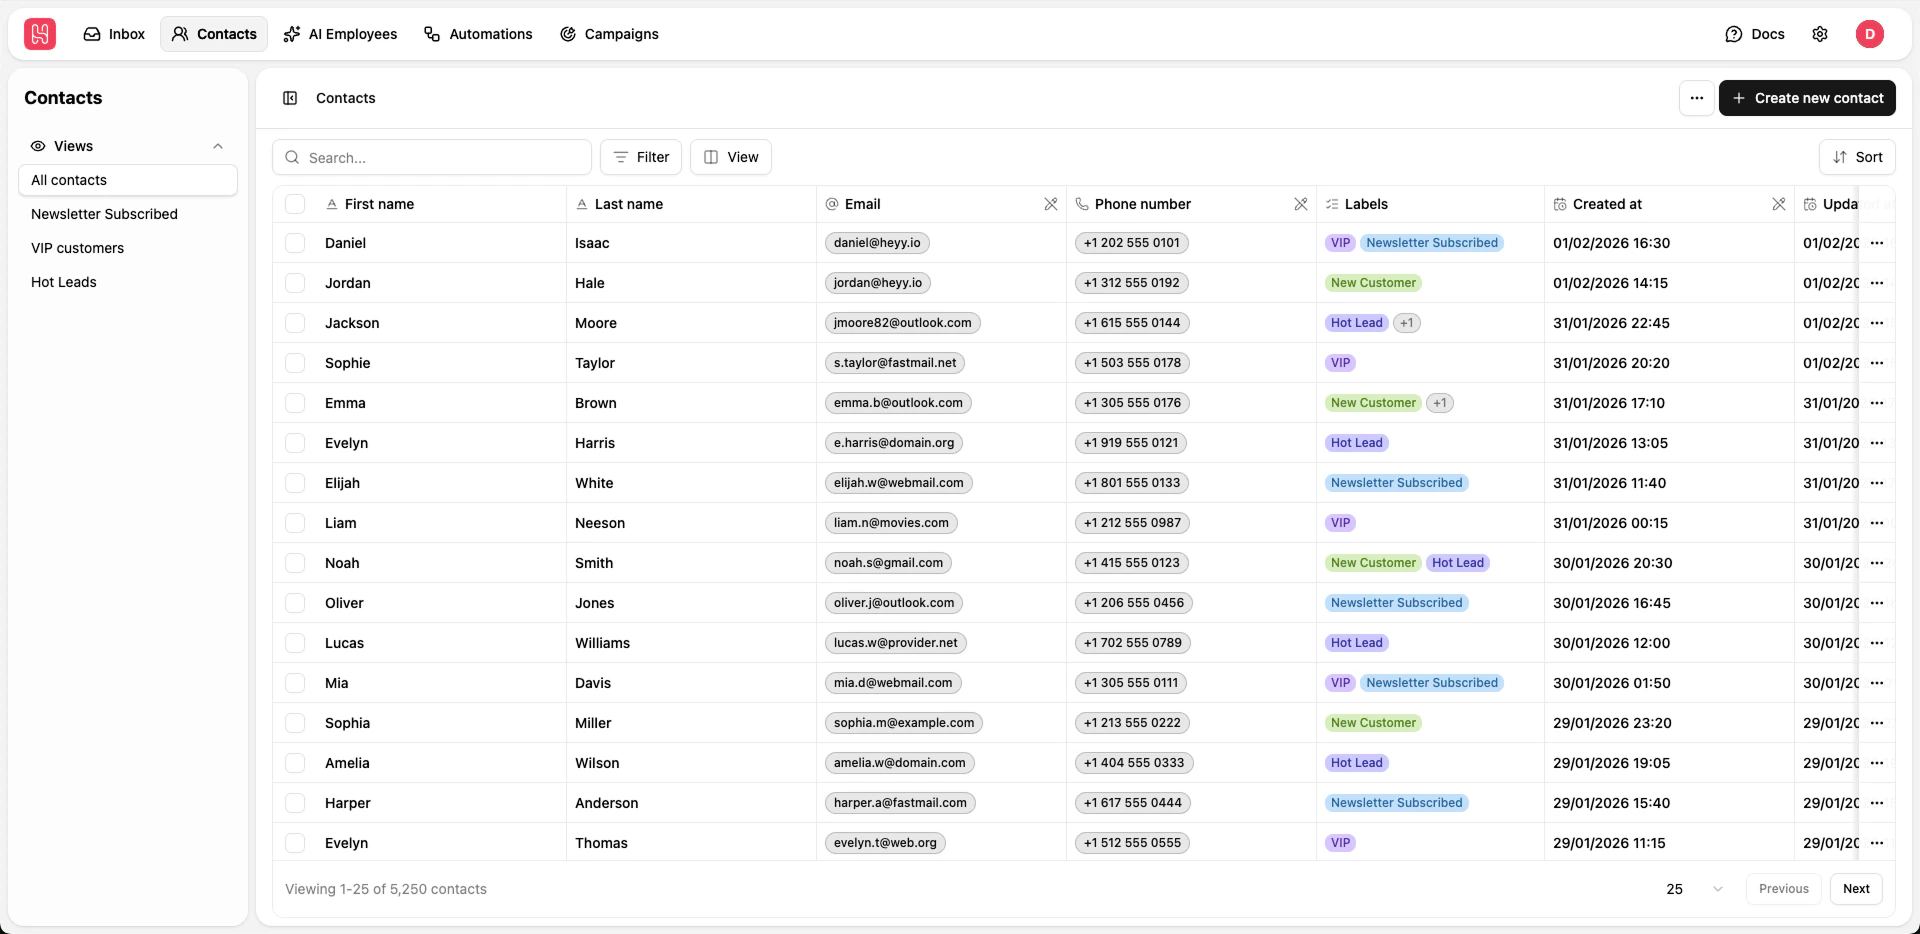
On the left sidebar, you’ll find your Views. Each view is a saved set of filters that shows a subset of your contacts.
Switching Views
- Click a view name in the sidebar to load that view. The contact table updates to show only contacts matching that view’s filters.
- Views are sorted by creation date. Your saved views appear in the list for quick access.
Creating and Managing Views
You can save the current filter as a new view:
- Click the Filter button above the contact table.
- Set your filter conditions (e.g. First Name, Email, Subscription Status, Labels, attributes).
- Add multiple conditions and choose AND or OR between them.
- Click Save View, name your view (e.g. “Free Trial Users”), and save. The view appears in the left sidebar.
To create, edit, or delete views centrally, go to Settings > Views. There you can manage all contact (and other) views in one place.
Saved views let you return to important groups of contacts without re-applying filters every time.
Main Contact Table
The center panel shows your contacts in a table. You can filter, sort, edit cells, and customize columns.
Filtering
- Click the Filter button in the toolbar above the table.
- Add one or more conditions (e.g. First Name, Last Name, Email, Subscription Status, Labels, or any custom attribute).
- Use the logical operator control to switch between AND and OR for multiple conditions.
- Click Filter to apply. The badge on the button shows how many filter conditions are active.
- Click Reset to clear all filters.
When a view is selected in the sidebar, its saved filters are applied automatically. You can still adjust filters on top of a view; the table reflects the current filter state.
Sorting
- Click the Sort (or sort menu) button in the toolbar.
- Choose the column to sort by (e.g. First Name, Last Name, Email, Phone, Created at, Updated at, or any attribute).
- Choose Ascending or Descending.
Sorting applies to the currently filtered list and resets to the first page.
Editing Cells
Many cells in the table are editable. Click a cell to edit it:
- First name and Last name – edit directly; changes save when you finish editing.
- Labels – add or remove labels via the cell control.
- Custom attributes – edit text, number, date, single-select, or multi-select values depending on the attribute type. Values are saved when you finish editing.
Some columns (e.g. Email, Phone number, Created at, Updated at) are read-only and cannot be edited in the table. To change email or phone, use the contact details panel (see below).
Pinning Columns
You can pin columns so they stay fixed while you scroll:
- Select (checkbox) is pinned on the left by default.
- Actions (e.g. View, Delete) is pinned on the right by default.
- In the View (columns) menu, columns marked with a pin icon are pinned; pinned columns cannot be reordered by drag-and-drop. Use the view/column menu to change which columns are pinned (if the app supports pinning more columns).
Your pinning choices are remembered for the next time you open Contacts.
Column Order and Visible Columns
- Click the View button (columns icon) in the toolbar.
- Visible columns – Use the toggle next to each column to show or hide it. Hidden columns are not shown in the table but data is still present (e.g. for export).
- Column order – Drag the grip handle next to unpinned columns to change their order. The order in the list is the order in the table. Pinned columns stay fixed and are not draggable in this list.
Your column order and visibility are saved and restored when you return to Contacts.
Adding More Columns (Custom Attributes)
The table shows built-in columns (name, email, phone, labels, dates) plus one column per custom attribute. To add more columns:
- Create attributes in Settings > Attributes (see the Creating Attributes section).
- After saving an attribute, it appears as a new column option in the contacts table. Open the View menu and ensure the new attribute column is visible and in the order you want.
Attributes can be used for filtering, sorting, and inline editing in the table, and their values are included in exports.
Pagination and Page Size
The table is paginated to keep the list fast and manageable.
- Page size – At the bottom of the table, use the page-size dropdown to choose how many contacts per page. Options are typically 25, 50, 100, 250, 500, and 1000. The default is 25. Your choice is remembered.
- Navigation – Use Previous and Next (or equivalent) to move between pages. The footer shows the current range (e.g. “1–25 of 500 contacts”).
Filtering and sorting apply to the full dataset; only the current page is shown in the table.
For each contact row you can open the full contact panel:
- Click View (or the view/open icon) in the row’s actions column.
- A panel opens on the right (or left in RTL) with the contact’s full details.
In the contact details panel you can switch between tabs:
- Contact info – Personal and profile details, custom attributes, and any other stored information. You can edit fields here.
- Notes – Add, edit, and manage notes for this contact.
- Chats – See all active (and recent) chats with this contact and open them.
Use this panel when you need full context before replying or when updating more than a few fields.
To add one contact manually:
- Click Create (or Create contact / plus button) in the top-right of the Contacts page.
- Fill in First name, Last name, Phone number, Email, and any extra attributes you use.
- Click Save.
The new contact appears in the table and in “All Contacts” and any view that matches their data.
Import and Export
Use the ⋮ (three-dot) menu in the top-right of the Contacts page.
- Choose Import contacts to add many contacts at once (e.g. from a CSV or another platform). Follow the import dialog to upload your file and map columns. Useful for migrations or bulk uploads.
- Choose Export contacts to download your contact list.
- Export respects the current filter: only contacts that match the active filters (and current view, if any) are included. To export everyone, clear filters or select a view that has no restrictions (e.g. “All Contacts”).
- Export includes all columns, not only the ones visible in the table. So you get built-in fields plus all custom attributes in the export file. The file is sent to your account email when the export is ready.
Use export for backups, analysis in spreadsheets, or sharing with teammates. Use import when moving contacts from another system or adding large lists.
- Centralized hub – All contacts in one place with flexible filtering and views.
- Custom organization – Save filters as views and manage them from the sidebar and Settings > Views.
- Flexible table – Filter, sort, edit cells, pin columns, and choose column order and visibility; preferences are saved.
- More columns via attributes – Add custom fields in Settings > Attributes and use them as columns, filters, and in export.
- Full contact context – Open the contact details panel for personal details, notes, and all active chats.
- Bulk operations – Import and export make it easy to scale and back up your contact list.
Getting Started Tips
- Start with All Contacts (or the default view) to see the full list.
- Create saved views for groups you use often (e.g. subscribers, free trial users, VIPs) and switch between them from the left sidebar.
- Use the View menu to show/hide and reorder columns, and pin the ones you use most.
- Add custom attributes in Settings > Attributes to track extra data and get more columns in the table and in exports.
- Use labels for quick categorization and filtering.
- Keep notes on contacts and check the Chats tab in the contact panel before replying.
- Export contacts regularly for backups; remember that export uses the current filter and includes all columns.