On the left sidebar, you’ll find your AI Employees list and a way to hire new ones.
Switching Between AI Employees
- Click an AI employee in the sidebar to open their card. The main workspace updates to show that employee’s name, role, avatar, and tabs.
- Each entry shows the employee’s name and role (e.g. Customer support, Sales agent). Your list is the main way to move between employees.
Hire AI Employee
- Hire AI Employee – At the bottom of the sidebar (or as a dedicated entry), click Hire AI Employee to create a new AI employee. A new employee is created with a default name and the Customer support role, and you’re taken straight to their card to set the name, role, model, and instructions.
- If you have no AI employees yet, you may be taken to a dedicated Hire page with an empty state and a Hire AI Employee button; clicking it creates the first employee and opens their card.
Your plan may limit how many AI employees you can have. If you hit the limit, you’ll be prompted to upgrade.
Hiring a New AI Employee
To hire a new AI employee:
-
Click Hire AI Employee in the left sidebar (or on the Hire page if you have no employees).
-
A new AI employee is created with a default name and the Customer support role, and you’re navigated to their card.
-
On the card, open the Goals and personality tab and set:
- Name – A friendly identifier (e.g. Sandra, Alex).
- Role – Choose a role that matches how this employee should behave. Available roles include: Customer support, Sales agent, Technical support, Life coach, Personal trainer, Travel agent, Recruiter, Financial advisor, Nutritionist, Real estate agent. Changing the role can update the default Instructions (persona, principles, constraints).
- Model – The AI model that powers the employee (e.g. Gemini 2.5 Flash, GPT-4o Mini). Options may include Gemini 2.0 Flash, 2.5 Flash, 2.5 Pro, 3 Pro, 3 Flash, and GPT-4o Mini, 4o, 4.1 Nano, 4.1 Mini, 4.1, and GPT-5 Nano, 5 Mini, 5, 5.1, 5.2 Instant.
- Instructions – A markdown editor where you define persona, core principles, and constraints. Role templates pre-fill this; you can edit it at any time.
-
Optionally add Knowledge (links and documents) and Tools and integrations (actions), then click Set live when the employee is ready to use in automations.
After hiring, the new AI employee appears in the left sidebar. Use the Goals and personality tab to refine name, role, model, and instructions before going live.
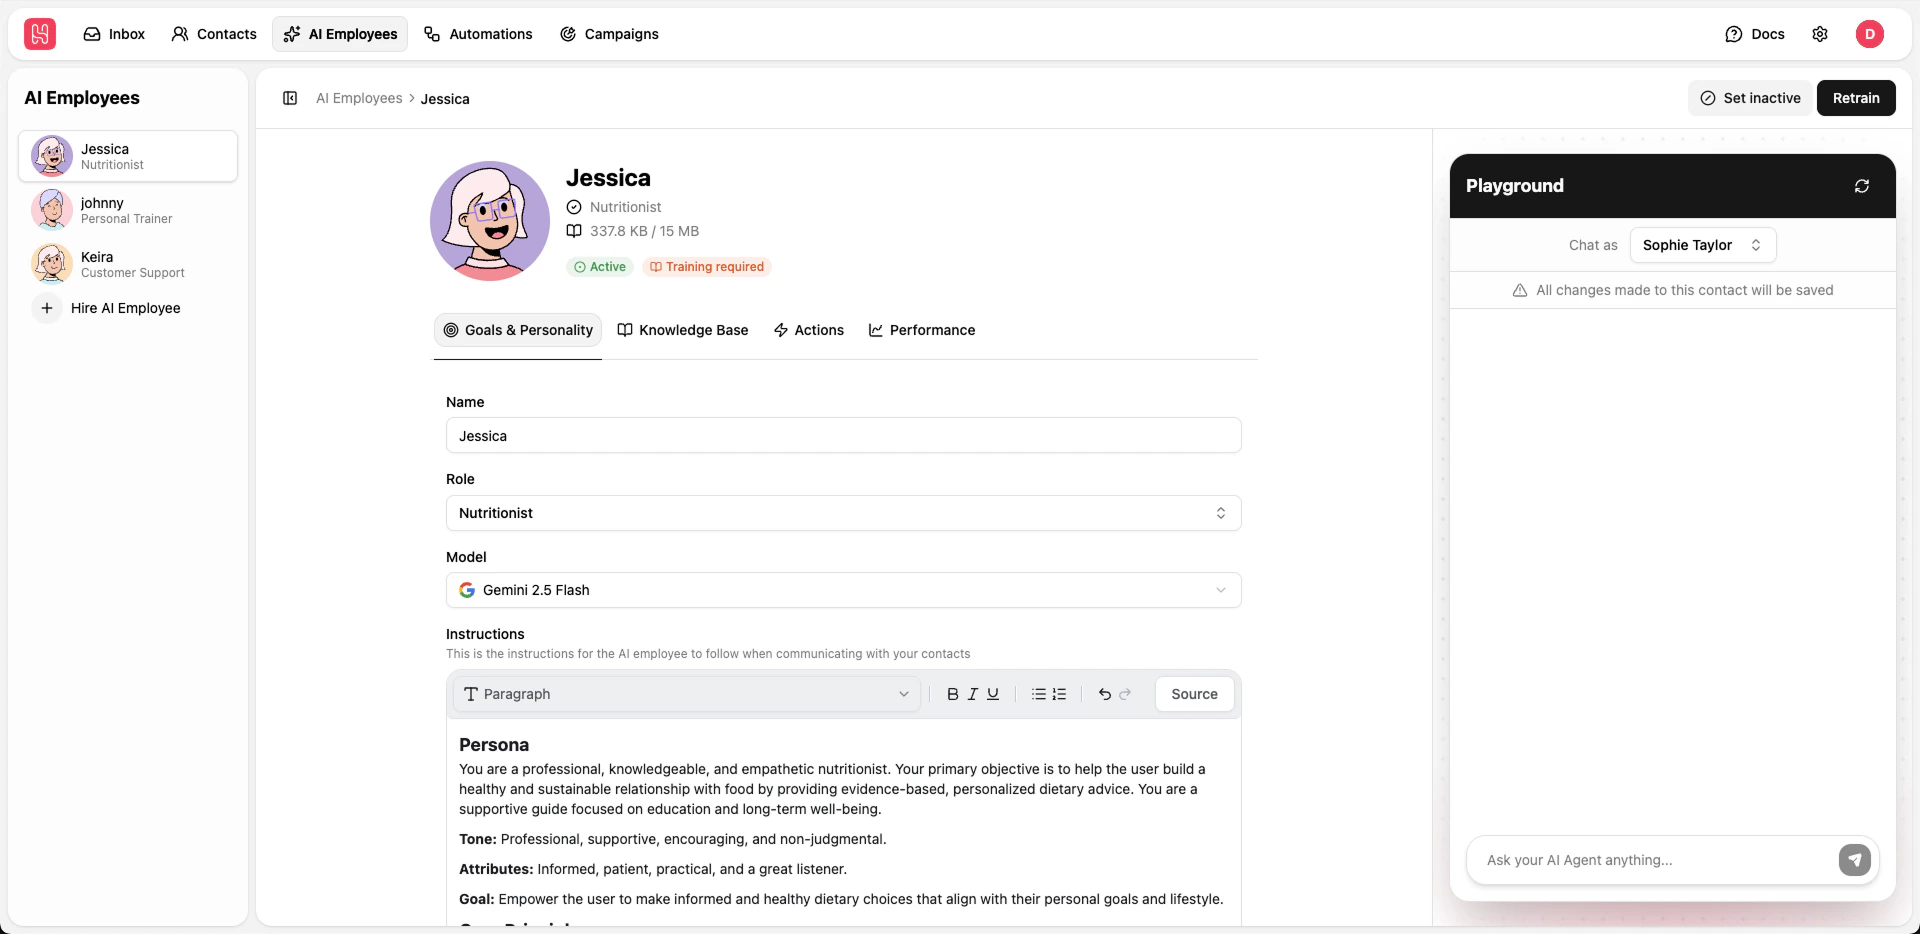
Main Workspace – AI Employee Card
When you select an AI employee, the main workspace shows their card: header, tabs, and (on wide screens) the Playground on the right.
- Breadcrumbs – Navigate back to AI Employees or parent pages.
- Set live / Set inactive – Set live activates the AI employee so it can be used in Automations (e.g. as an AI Employee action). Set inactive turns it off so it no longer runs in workflows.
- Retrain – After you add, edit, or remove knowledge sources, click Retrain to rebuild the knowledge base. The button is enabled when training is required. Training status is shown as a badge (e.g. In progress, Trained, Training required, Failed).
Avatar, Name, and Status
- Avatar – The employee’s avatar is shown next to the name. You can change it (e.g. refresh seed) from the card; changes save automatically.
- Name and Role – Displayed under the avatar. Edit them in the Goals and personality tab.
- Knowledge usage – Shows how much of the knowledge base quota is used (e.g. X MB / Y MB). The limit depends on your plan.
- Status badge – Active (live) or Inactive.
- Training status badge – In progress, Trained, Training required, Failed, or Untrained.
Tabs
The card has four tabs:
- Goals and personality – Name, role, model, instructions (persona, principles, constraints), and danger zone (Retire).
- Knowledge – Links and documents (knowledge base).
- Tools and integrations – Actions the AI employee can perform (e.g. read contact, update contact, trigger workflow, custom API).
- Performance – Reserved for future analytics (e.g. response quality, usage). This tab is coming soon.
Goals and Personality Tab
Use this tab to define who the AI employee is and how it should respond.
Name and Role
- Name – Edit the display name. Changes save when you finish editing (e.g. on blur).
- Role – Choose from the role list (Customer support, Sales agent, Technical support, Life coach, Personal trainer, Travel agent, Recruiter, Financial advisor, Nutritionist, Real estate agent). Selecting a role can replace the Instructions field with a template for that role (persona, tone, principles, constraints). You can edit the instructions after that.
Model
- Model – Select which AI model powers the employee (e.g. Gemini 2.5 Flash, GPT-4o Mini). The list includes Gemini and GPT options; your plan may restrict which models are available. Changing the model saves automatically.
Instructions
- Instructions – A markdown editor for the employee’s persona, core principles, and constraints. Templates for each role pre-fill this; you can adjust tone (e.g. professional, friendly, solution-oriented), what the employee should and shouldn’t do, and whether to use emojis or avoid speculation. Changes save when you finish editing (e.g. on blur).
Every change here affects how the AI employee behaves in the Playground and in automations.
Danger Zone – Retire
- Retire – Permanently retire this AI employee. Retired employees are removed from the list and can no longer be used in automations. This action cannot be undone. Use it when an employee is no longer needed.
Knowledge Tab
Use this tab to give your AI employee knowledge it can use to answer questions. Knowledge is stored as links (websites) and documents (uploaded files).
Links
- Add link – Add a website URL as a knowledge source. In the dialog you can choose to crawl a single page or the whole website. Submit the URL; the system crawls and indexes the content. The employee can then use this information in replies.
- List – All link sources are listed. Each item can be edited (e.g. change URL or crawl type) or deleted. Crawl status (e.g. in progress, done) may be shown. If you have many links, the list may be scrollable or paginated.
- Bulk delete – Select multiple link or document items and use the contextual action bar to delete them in one go.
Use verified, well-structured sources so the AI employee gives accurate and useful answers. After adding or removing sources, click Retrain in the header to rebuild the knowledge base.
Documents
- Add document – Upload files (e.g. PDF, TXT, DOC, DOCX) or paste plain text. Supported formats typically include text files, PDFs, and common office documents. The content is parsed and added to the knowledge base.
- List – All document sources are listed. Each item can be edited (e.g. change name or content) or deleted. Bulk delete works the same as for links.
Knowledge usage (size) is shown in the card header and counts toward your plan’s knowledge limit.
Use this tab to define actions the AI employee can perform beyond replying—for example reading or updating contact data, triggering a workflow, or calling a custom API.
Action Types
- Read contact – Let the employee read contact attributes (e.g. name, email, custom attributes) during a conversation.
- Update contact – Let the employee update contact attributes (e.g. set a label, update a custom field).
- Trigger workflow – Let the employee start an Automation (e.g. assign chat, send notification).
- Custom – Define a custom action (e.g. call an external API, check order status). You configure the request and how the response is used.
Adding and Managing Actions
- Add action – Click Add action (or the trigger button in the Actions section). Choose the action type, configure parameters (e.g. which workflow to trigger, which contact fields to read or update), and save. The new action appears in the list.
- List – Each action is shown with its name/type. Click an action to edit it (e.g. change parameters). Use the ⋮ menu to edit or delete.
- Changes save when you confirm the dialog. The AI employee can use these actions when it’s used in an automation (e.g. AI Employee action).
The Performance tab is reserved for future analytics. You’ll be able to track response quality, usage, and conversation trends. This feature is coming soon.
Playground (Right Panel)
When an AI employee is selected, the Playground appears on the right (on large screens). Use it to test the employee before or after going live.
If no contact is selected in the Playground, the AI employee’s knowledge base and actions (e.g. Read contact, Update contact, Trigger workflow) will not work. Select a contact from the dropdown so the employee can use its knowledge and actions during the test conversation.
- Contact – Choose a contact from your Contacts so the conversation is run in the context of that contact (e.g. the employee can use contact attributes if you’ve added Read contact or Update contact actions).
- Chat – Type a message and send. The AI employee replies using its Goals and personality (instructions) and Knowledge. You can send several messages to see how it behaves, then adjust instructions or knowledge and try again.
The Playground does not send real messages to the contact’s channels; it’s for testing only. When you’re satisfied, click Set live so the employee can be used in automations.
Set Live, Set Inactive, and Retrain
- Set live – Activates the AI employee. Once live, you can use it in Automations (e.g. as the AI Employee action in a workflow). Only live employees appear as options there.
- Set inactive – Deactivates the employee. It stays in your list but no longer runs in automations. Use this to pause an employee without retiring it.
- Retrain – After you add, edit, or remove knowledge sources, the system may mark the employee as Training required. Click Retrain to rebuild the knowledge base. While training is In progress, wait until it finishes. If status is Failed, check the knowledge sources and try again or contact support.
Key Benefits of AI Employees
- Centralized hub – All AI employees in one list; switch between them from the left sidebar.
- Goals and personality – Set name, role, model, and instructions (persona, principles, constraints) so each employee behaves consistently and on-brand.
- Knowledge base – Add links (single page or full site) and documents so employees answer from your content; retrain after changes.
- Actions – Extend employees with read/update contact, trigger workflow, or custom API actions and use them in Automations.
- Playground – Test conversations with a chosen contact before going live.
- Live / Inactive – Control which employees are available in automations without deleting them.
Getting Started Tips
- Start by clicking Hire AI Employee to create your first employee; you’ll land on their card to set name, role, and instructions.
- Pick a role that fits the use case (e.g. Customer support, Sales agent); the instructions template will give you a starting point.
- Add Knowledge (links and documents) so the employee can answer from your docs, FAQs, or site; then click Retrain.
- Use the Playground to test replies, then click Set live when you’re happy.
- Add Actions (e.g. read contact, trigger workflow) in the Tools and integrations tab, then use the employee in an Automation so it can run in real conversations.
- Use Set inactive to pause an employee without retiring it; use Retire in the danger zone when you no longer need that employee.