Left Sidebar
The left sidebar helps you filter and organize your campaigns:- All Campaigns – Shows all the campaigns in your workspace.
- Scheduled – Shows all the scheduled campaigns.
- Recurring - Shows all the recurring campaigns.
Campaign List
The campaign list displays each campaign along with its key details:- Name – The label you gave the campaign when creating it.
- Type – Whether it’s scheduled, recurring, or one time.
- Latest Execution Status – The most recent result (e.g., completed, in progress, failed).
- Total Recipients – Number of contacts included in the campaign.
- Created At – The date the campaign was first created.
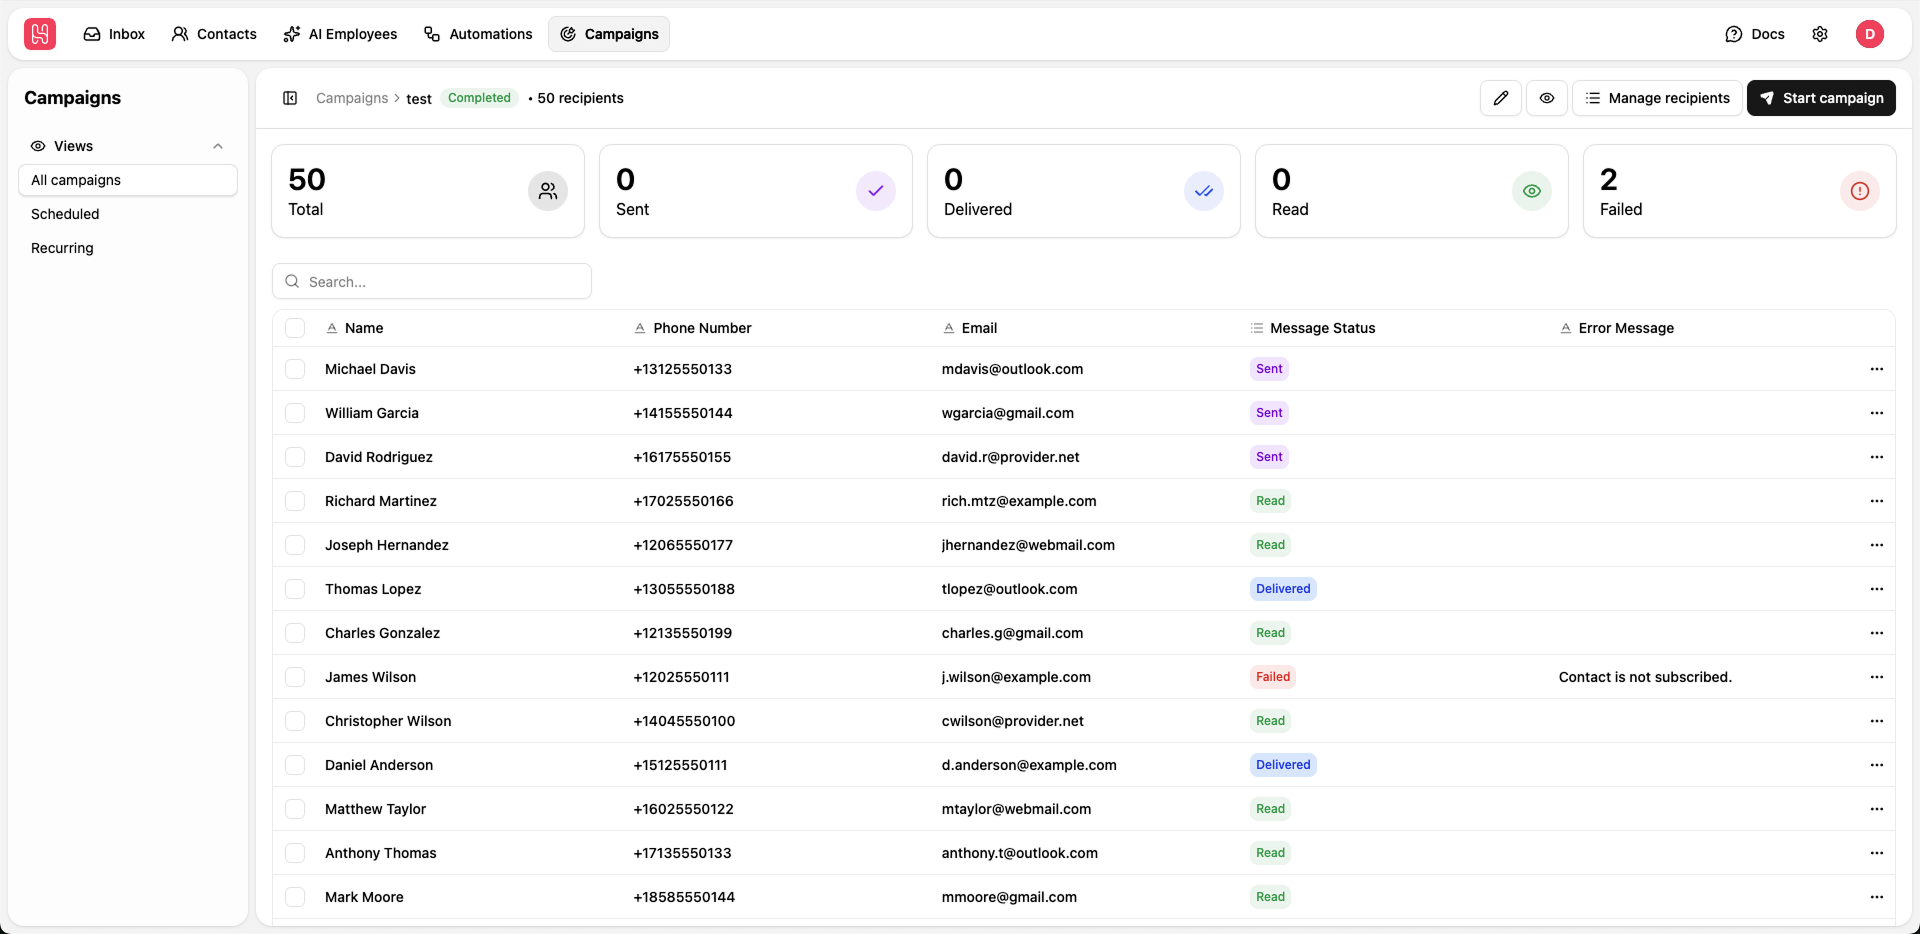
Campaign View
Inside a campaign, you can see performance and delivery details, including:- Total – How many contacts were in the latest campaign execution.
- Sent – The number of messages in the “sent” status.
- Delivered – The number of messages with successful deliveries.
- Read – The number of messages that were read.
- Failed – The number of messages that failed to deliver.
You need to run the campaign at least once to see its performance and delivery details.
Toolbar actions
At the top of the campaign view, you can access key actions:- Edit (pencil icon) – Update the campaign name, linked automation, scheduling, and recurrence settings.
- Preview automation (eye icon) – Open a read-only preview of the connected automation to review the flow before running the campaign.
- Manage recipients – Add or remove recipients from the campaign audience without changing the underlying automation.
- Start campaign – Open a final preview of the automation and audience before sending the campaign.
If the campaign is configured as Scheduled or Recurring, the Start campaign button is disabled because the campaign will run automatically according to its schedule.
Creating a New Campaign
Name your campaign
Enter a clear, descriptive name so your team can easily identify the campaign later.
Select an automation
Choose a predefined automation from the Automation dropdown. This defines what messages and logic will run when the campaign is executed.
To run a campaign on WhatsApp you need to create a WhatsApp template and then connect it to an Automation with a trigger of type Manual Trigger.
Choose the campaign type
Decide how the campaign should run:
- Scheduled – Runs once at a specific date and time.
- Recurring – Runs automatically on a repeating schedule.
You can only choose one option at a time (either Scheduled or Recurring). Each option lets you define its own timing and recurrence settings.
Select recipients / audience
Define who should receive the campaign by selecting the appropriate audience.
Create the campaign
Click Create Campaign to save the configuration. The campaign will be ready to run but will not start automatically unless it’s scheduled.
To start a campaign, go to the Campaigns page, open the specific campaign, and click Start Campaign in the top-right corner. Campaigns are reusable, so you can run them as many times as you need.