> ## Documentation Index
> Fetch the complete documentation index at: https://docs.heyy.io/llms.txt
> Use this file to discover all available pages before exploring further.
# Live Chat
> Embed a Live Chat widget on your website for support, information, and more, with full Heyy features like Inbox, automations, and AI Employees.
 Live Chat is a widget you embed on your website so visitors can chat with you directly. Use it for customer support, FAQs, lead capture, or any conversation you want to have on your site. All chats appear in your Heyy [Inbox](/quick-start/inbox), and you get the same [automations](/quick-start/automations/triggers), [AI Employees](/quick-start/ai-employees), [contacts](/quick-start/contacts), and [campaigns](/quick-start/campaigns) as with WhatsApp, Instagram, and other channels, no separate tool.
## Connecting a Live Chat channel
1. Go to **Settings → Channels** in your Heyy dashboard.
2. Click **Add Channel**.
3. Select **Live Chat**.
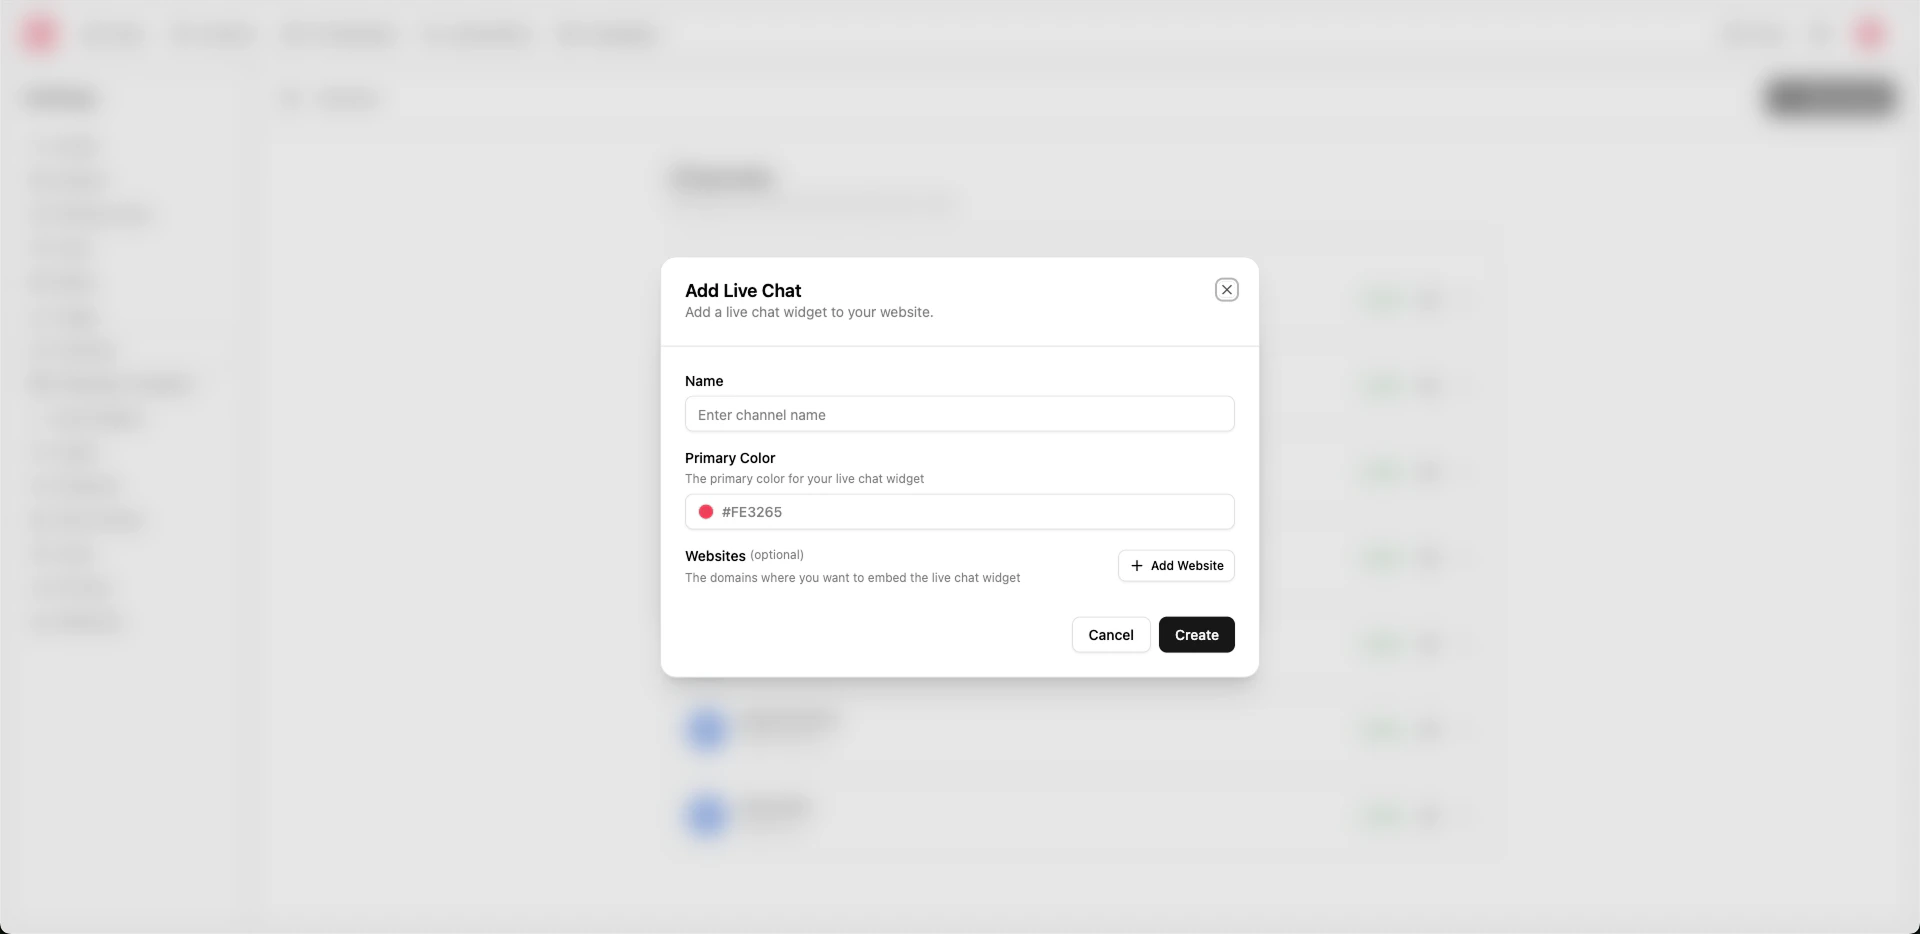
4. In the dialog, fill in:
* **Name** (required): A label for this channel (e.g. "Website support").
* **Primary color**: The accent color for the widget (default is pink). You can change this later.
* **Websites** (optional): Domains where the widget is allowed to load (e.g. `example.com`). Leave empty to allow all domains, or add domains for tighter security.
5. Click **Create**.
You’ll be taken to the channel’s edit page to configure content, style, security, visibility, and installation.
## Editing and updating your Live Chat
Open the channel from **Settings → Channels** and use the tabs to change how the widget looks and behaves.
### Content
* **Title**: The heading shown in the widget.
* **Message placeholder**: Placeholder text in the message input (e.g. "Ask a question...").
* **Initial messages**: Messages shown when the chat opens (e.g. "Hello, how can I help you today?").
* **Suggested messages**: Quick-reply buttons visitors can tap.
* **Profile picture**: Avatar for the widget.
* **Remove Powered by**: Option to hide the Heyy branding.
### Style
* **Theme**: Light or dark.
* **Primary color**: Widget accent color.
* **Alignment**: Position the widget on the left or right.
* **Direction**: Left-to-right or right-to-left for RTL languages.
* **Position**: Fine-tune the widget’s position (X/Y).
### Security
* **Allowed domains**: List of domains where the widget may load. Restrict this to your real sites for security.
* **Secret keys**: Keys for server-side user identification using our SDK (coming soon!).
### Visibility
* **Hidden paths**: URL paths on your site where the widget is hidden (e.g. thank-you or checkout pages).
### Installation
* **Embed code**: A script snippet with your **widget ID** that you add to your website. Copy it from this tab.
* Platform-specific steps are available for **Code**, **Webflow**, **WordPress**, **Framer**, **Wix**, and **Squarespace**.
After you add the script to your site, the widget loads from Heyy and appears according to your content and style settings.
## Removing a Live Chat channel
Deleting a Live Chat channel is **irreversible**. The widget will stop working on all sites where it’s embedded. Existing conversations and history for that channel may be lost or no longer accessible. If you might need the data later, export or back up before deleting. Remove the embed code from your site if you no longer want the widget to appear.
To remove a Live Chat channel, go to **Settings → Channels**, open the Live Chat channel, and use the delete or remove option for that channel.
## Use cases
* **Customer support**: Answer questions and resolve issues directly on your site. All chats land in your [Inbox](/quick-start/inbox).
* **Information and FAQs**: Use initial and suggested messages, plus an [AI Employee](/quick-start/ai-employees), to guide visitors to the right information.
* **Lead capture**: Start conversations, capture [contacts](/quick-start/contacts) and attributes, and follow up with [campaigns](/quick-start/campaigns) or other channels (e.g. [WhatsApp](/channels/whatsapp)).
* **Automations**: Use [Live Chat triggers](/quick-start/automations/triggers) and [Live Chat actions](/quick-start/automations/live-chat-actions) (e.g. send message, wait for reply) for welcome flows, routing, or follow-ups.
* **AI Employees**: Assign an [AI Employee](/quick-start/ai-employees) to handle first-line replies 24/7.
Restrict **allowed domains** so the widget only loads on your real sites. Use **hidden paths** to hide the widget on specific pages (e.g. thank-you or checkout). Test the widget on a staging domain before going live.
Live Chat is a widget you embed on your website so visitors can chat with you directly. Use it for customer support, FAQs, lead capture, or any conversation you want to have on your site. All chats appear in your Heyy [Inbox](/quick-start/inbox), and you get the same [automations](/quick-start/automations/triggers), [AI Employees](/quick-start/ai-employees), [contacts](/quick-start/contacts), and [campaigns](/quick-start/campaigns) as with WhatsApp, Instagram, and other channels, no separate tool.
## Connecting a Live Chat channel
1. Go to **Settings → Channels** in your Heyy dashboard.
2. Click **Add Channel**.
3. Select **Live Chat**.
4. In the dialog, fill in:
* **Name** (required): A label for this channel (e.g. "Website support").
* **Primary color**: The accent color for the widget (default is pink). You can change this later.
* **Websites** (optional): Domains where the widget is allowed to load (e.g. `example.com`). Leave empty to allow all domains, or add domains for tighter security.
5. Click **Create**.
You’ll be taken to the channel’s edit page to configure content, style, security, visibility, and installation.
## Editing and updating your Live Chat
Open the channel from **Settings → Channels** and use the tabs to change how the widget looks and behaves.
### Content
* **Title**: The heading shown in the widget.
* **Message placeholder**: Placeholder text in the message input (e.g. "Ask a question...").
* **Initial messages**: Messages shown when the chat opens (e.g. "Hello, how can I help you today?").
* **Suggested messages**: Quick-reply buttons visitors can tap.
* **Profile picture**: Avatar for the widget.
* **Remove Powered by**: Option to hide the Heyy branding.
### Style
* **Theme**: Light or dark.
* **Primary color**: Widget accent color.
* **Alignment**: Position the widget on the left or right.
* **Direction**: Left-to-right or right-to-left for RTL languages.
* **Position**: Fine-tune the widget’s position (X/Y).
### Security
* **Allowed domains**: List of domains where the widget may load. Restrict this to your real sites for security.
* **Secret keys**: Keys for server-side user identification using our SDK (coming soon!).
### Visibility
* **Hidden paths**: URL paths on your site where the widget is hidden (e.g. thank-you or checkout pages).
### Installation
* **Embed code**: A script snippet with your **widget ID** that you add to your website. Copy it from this tab.
* Platform-specific steps are available for **Code**, **Webflow**, **WordPress**, **Framer**, **Wix**, and **Squarespace**.
After you add the script to your site, the widget loads from Heyy and appears according to your content and style settings.
## Removing a Live Chat channel
Deleting a Live Chat channel is **irreversible**. The widget will stop working on all sites where it’s embedded. Existing conversations and history for that channel may be lost or no longer accessible. If you might need the data later, export or back up before deleting. Remove the embed code from your site if you no longer want the widget to appear.
To remove a Live Chat channel, go to **Settings → Channels**, open the Live Chat channel, and use the delete or remove option for that channel.
## Use cases
* **Customer support**: Answer questions and resolve issues directly on your site. All chats land in your [Inbox](/quick-start/inbox).
* **Information and FAQs**: Use initial and suggested messages, plus an [AI Employee](/quick-start/ai-employees), to guide visitors to the right information.
* **Lead capture**: Start conversations, capture [contacts](/quick-start/contacts) and attributes, and follow up with [campaigns](/quick-start/campaigns) or other channels (e.g. [WhatsApp](/channels/whatsapp)).
* **Automations**: Use [Live Chat triggers](/quick-start/automations/triggers) and [Live Chat actions](/quick-start/automations/live-chat-actions) (e.g. send message, wait for reply) for welcome flows, routing, or follow-ups.
* **AI Employees**: Assign an [AI Employee](/quick-start/ai-employees) to handle first-line replies 24/7.
Restrict **allowed domains** so the widget only loads on your real sites. Use **hidden paths** to hide the widget on specific pages (e.g. thank-you or checkout). Test the widget on a staging domain before going live.